PhotoAcute produces a combined image from a sequence of
continuous photographs, thus acquiring more graphic information than is
available from any one photograph. Using sophisticated proprietary algorithms,
it combines the individual frames to produce one large- sized and high-quality
image. This kind of technique is usually called "super-resolution
processing".
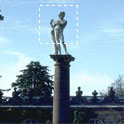
Unlike digital zooming and image sharpening, the photographs produced by PhotoAcute do really have higher spatial resolution.
Small, thin and far-away objects, traceries, textures and inscriptions become recognizable.
PhotoAcute super-resolution algorithms are tuned for particular camera/lens models to achieve maximum quality.
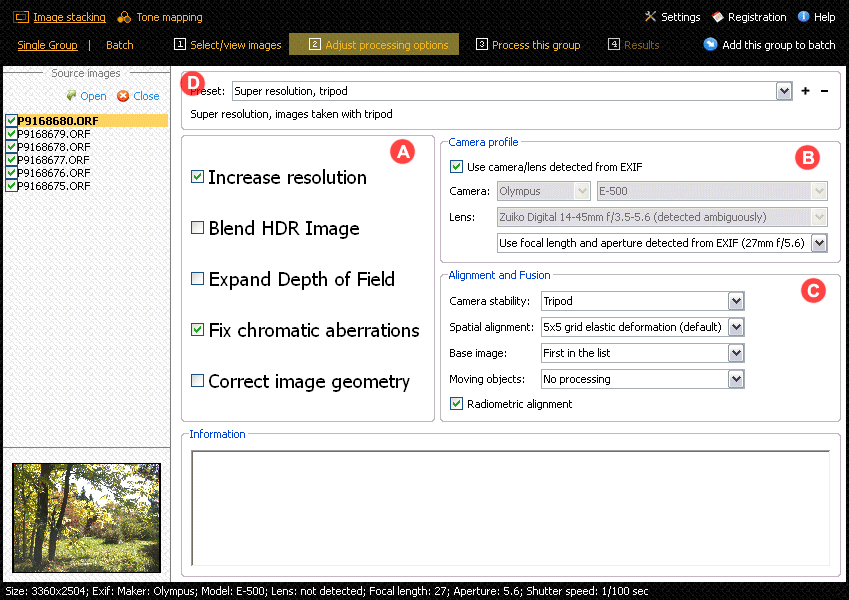
Usage: To perform Super Resolution processing turn on the Increase Resolution option in the processing options pane.. Superresolution processing depends on a camera profile for the given camera model.
It is highly recommended to use high ISO levels (e.g. 400) for super-resolution processing. Cameras automatically use long exposures when ISO is low, and this leads to handshaking artifacts that can significantly decrease the level of detail of the picture. At the same time, the noise caused by high ISO can be efficiently reduced during super-resolution processing.
More information:
Super Resolution FAQ (on PhotoAcute site)
Measuring the increase of image resolution (on PhotoAcute site)
Read more about Super Resolution at Wikipedia
Unlike digital zooming and image sharpening, the photographs produced by PhotoAcute do really have higher spatial resolution.
Small, thin and far-away objects, traceries, textures and inscriptions become recognizable.
PhotoAcute super-resolution algorithms are tuned for particular camera/lens models to achieve maximum quality.
 |
 |
 |
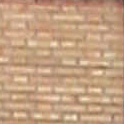 |
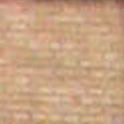
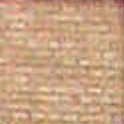
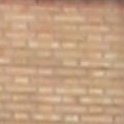
| source photograph (one of a set): camera resolution was not enough to capture the brickwork pattern | strong sharpening does not reveal more details | super-resolution applied to the whole set of photographs: the pattern is much more apparent, as if it was captured by a camera with higher resolution | sharpening applied to the result of superresolution processing - for comparison with the sharpened original |
Usage: To perform Super Resolution processing turn on the Increase Resolution option in the processing options pane.. Superresolution processing depends on a camera profile for the given camera model.
It is highly recommended to use high ISO levels (e.g. 400) for super-resolution processing. Cameras automatically use long exposures when ISO is low, and this leads to handshaking artifacts that can significantly decrease the level of detail of the picture. At the same time, the noise caused by high ISO can be efficiently reduced during super-resolution processing.
More information:
Super Resolution FAQ (on PhotoAcute site)
Measuring the increase of image resolution (on PhotoAcute site)
Read more about Super Resolution at Wikipedia
By using an advanced weighting technique, PhotoAcute is able to restore
shadows and clipped highlights from photographs taken in
exposure-bracketing mode. It produces an image that otherwise could
only be taken with a camera that had much wider
dynamic range.
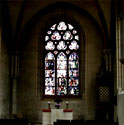
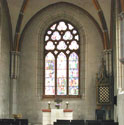
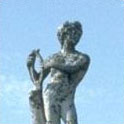
This feature becomes especially handy for objects photographed on back-lit background (e.g. window, a light snow, direct sunlight), or scenes that have important details in the shadow.
PhotoAcute introduces advanced HDR blending techniques: a precise radiometric alignment for producing consistent HDR images of scenes with moving objects and varying illumination; and "Noise-free HDR" to get rid of the noise in shadow areas of HDR images.
Usage: Dynamic range expansion is turned on/off with the Blens HDR image option the corresponding checkbox in the processing options pane.
More information:
Read more about dynamic range
Precise radiometric alignment: Produce consistent HDR images of scenes with moving objects and varying illumination. (on PhotoAcute site)
Noise-free HDR: expand dynamic range and get rid of the noise (on PhotoAcute site)
This feature becomes especially handy for objects photographed on back-lit background (e.g. window, a light snow, direct sunlight), or scenes that have important details in the shadow.
PhotoAcute introduces advanced HDR blending techniques: a precise radiometric alignment for producing consistent HDR images of scenes with moving objects and varying illumination; and "Noise-free HDR" to get rid of the noise in shadow areas of HDR images.
 |
 |
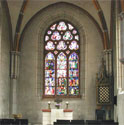 |
| highlights captured, shadows lost | shadows captured, highlights lost | both shadow and highlight details are visible |
Usage: Dynamic range expansion is turned on/off with the Blens HDR image option the corresponding checkbox in the processing options pane.
More information:
Read more about dynamic range
Precise radiometric alignment: Produce consistent HDR images of scenes with moving objects and varying illumination. (on PhotoAcute site)
Noise-free HDR: expand dynamic range and get rid of the noise (on PhotoAcute site)
Focus stacking is a digital image processing technique which combines multiple
images taken at different focal distances to give a resulting image with a
greater depth of field than any of the individual source images.
The classic way to extend depth of field is to take images using a narrow lens aperture. This solution has two serious disadvantages. Small apertures bring more light diffraction, degrading the image resolution and they reduce the light transmission, forcing the use of longer exposures, which leads to motion blur in the pictures. Also, even using the smallest aperture is sometimes not enough to capture the entire scene sharply.
The alternative way is to take several frames of the same scene with different focal lengths. Each of these images has its own depth of field and they can be merged together, combining focused areas of each image and producing a resulting image with cumulative depth of field.
Using this technique is essential in macro-photography and micro-photography as well as in all situations when the very near and very far objects in the scene have to be captured acutely.
Usage: Turn on the Focus stacking option in the processing options pane.
Every lens focuses the light of different wavelengths in different positions.
This causes chromatic aberration that is seen as "fringes" of color around the
image. PhotoAcute corrects this aberration, minimizing the circle of
confusion.
The correction is performed automatically, with no need of manual adjustments of any parameters.
Usage: Color fringing correction is turned on/off with the Fix chromatic aberrations option the corresponding checkbox in the processing options pane.
More information:
Read more about chromatic aberrations
The correction is performed automatically, with no need of manual adjustments of any parameters.
 |
 |
 |
| source photograph | color fringes | resulting photograph |
Usage: Color fringing correction is turned on/off with the Fix chromatic aberrations option the corresponding checkbox in the processing options pane.
More information:
Read more about chromatic aberrations
By combining several imagess, PhotoAcute automatically reduces the
noise.
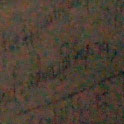
The main problem of noise reduction techniques is that the more noise is reduced, the more image details are lost. This becomes extremely apparent in the low light scenes (e.g. night photos or shadowy parts of the scene).
The main problem of noise reduction techniques is that the more noise is reduced, the more image details are lost. This becomes extremely apparent in the low light scenes (e.g. night photos or shadowy parts of the scene).
PhotoAcute provides high noise reduction without losing the image details.
 |
 |
 |
| source photograph (one of a set) | a photograph processed using the noise reduction utility (one of the leaders on the market) | whole set, as processed by PhotoAcute with NO super-resolution |
Usage: Noise reduction is performed automatically when stacking the images.
More information:
Read more about noise and its reduction
PhotoAcute corrects geometric distortion caused by the camera optics.
This gives photographs the right perspective and a natural look.
Usage: Geometry correction is turned on/off with the Correct geomerty option in the processing options pane. This feature requires availability of a profile for the given camera/lens combination.
Usage: Geometry correction is turned on/off with the Correct geomerty option in the processing options pane. This feature requires availability of a profile for the given camera/lens combination.